Ca. vor einem Jahr habe ich hier über PIM geschrieben… Der Artikel bleibt bis heute sehr relevant und ich kann ihn nur empfehlen. Was ich im heutigen Beitrag schreibe ist als Ergänzung zu verstehen, aber auch für sich allein lesenwert.
Wusstest Du, dass es in Microsoft Azure sehr viele (mehr als 120) Standard-Rollen gibt, die inviduell vergeben werden können? Eine detaillierte Uebersicht ist hier zu finden. Ein Teilgebiet von Azure ist der Verzeichnisdienst ‚Entra‘ der die Identitäten verwaltet. Auch hier gibt es dutzende von Rollen.
Nicht alle dieser vielen Rollen, sind gleich kritisch. Microsoft bezeichnet die besonders wichtigen Rollen als ‚Privilegiert‘. Das sind Rollen mit höheren Berechtigungen, die besonders geschützt werden müssen (mit PIM).
RBAC tönt erstmal sehr einfach vom Konzept. Ich sage einfach, was ich so zum Arbeiten brauche und dann teilt mir jemand eine passende Rolle zu. Aber was brauche ich überhaupt? Wenn man konkret rückfragt, will man einfach mal ‚alles‘ machen können. Wer möchte denn in seiner Arbeit eingeschränkt sein? Das ist der Grund warum man in ‚gewachsenen‘ Active Directory Umgebungen immer sehr viele ‚Domain Admins‘ findet und neuerdings in Azure Umgebungen viele ‚Global Admins‘. Das ist so wie wenn wir den Generalschlüssel verteilen, weil man ja vielleicht mal in den Heizungsraum muss. Keine gute Idee! Es lohnt sich hier etwas Arbeit zu investieren und die Rollen festzulegen.

Die Azure / M365 / Entra Rollen sind alle gut dokumentiert und teilweise auch sehr klar. Was der ‚Teams Administrator‘ so tut, sollte klar sein? Leider nein. Es macht schon einen Unterschied ob man den ganzen Teams Service verwaltet (Rolle: Teams Administrator) oder vor allem die Telefonie Funktionen von Teams bearbeitet (Rolle: Teams Telephony Administrator)
Ein Problem, auf dass man praktisch bald stossen wird ist: Die Services im M365 sind stark miteinander verzahnt. Hinter Teams läuft Sharepoint als Ablage und es gibt M365 Gruppen über die Mail verschickt wird. Um alle drei Gebiete End-to-End verwalten zu können bräuchte ich dann:
- Exchange Administrator
- Teams Administrator
- Sharepoint Administrator
Wenn ich die Zugänge mit PIM verwalte, müsste ich mir alle drei Rollen separat bestellen. Sehr umständlich! Ok, ich könnte mir auch Custom Rollen bauen bei denen ich die Microsoft Rollen selber nachdefiniere. Diese Variante ist möglich, muss aber immer gepflegt werden wenn sich bei den Microsoft Standard Rollen was ändert. Das könnten zum Beispiel neue Rechte sein, was bei der schnellen Entwicklung der Cloud Dienste jederzeit passieren kann.
Eine bessere Variante ist eine eigene Entra RBAC Gruppe zu erstellen und diese ins PIM Management zu integrieren. Danach kann ich mir Rechte zur selber erstellten RBAC Gruppe via PIM bestellen und erhalte zeitgesteuert die Funktion aller verknüpfen Azure Standard Rollen. Die Rollenzuteilungen können jederzeit geändert werden aber der Bestellprozess bleibt unverändert. Ideal auch bei Reorganisationen etc.

Im folgenden erkläre ich wie das geht. Grundlage ist das Beispiel bei dem ich gleichzeitig für die die drei Hauptdienste von M365 (Teams, Exchange, Sharepoint) verantwortlich bin.
Eigene RBAC Gruppen im PIM verwalten
Welche Rechte brauche ich um das einzurichten?
- Die Rolle des ‚Privileged Role Administrator‘ – dieser definiert und aktualisiert die PIM Rollen
Was sind die groben Schritte?
- Neue Gruppe erstellen im Entra und Rollen zuweisen
- Die Gruppe im PIM für Management aktivieren
Wie geht das im Detail?
- Gehe zu ‚https://portal.azure.com‘
- Microsoft Entra ID – Gruppen – Neue Gruppe
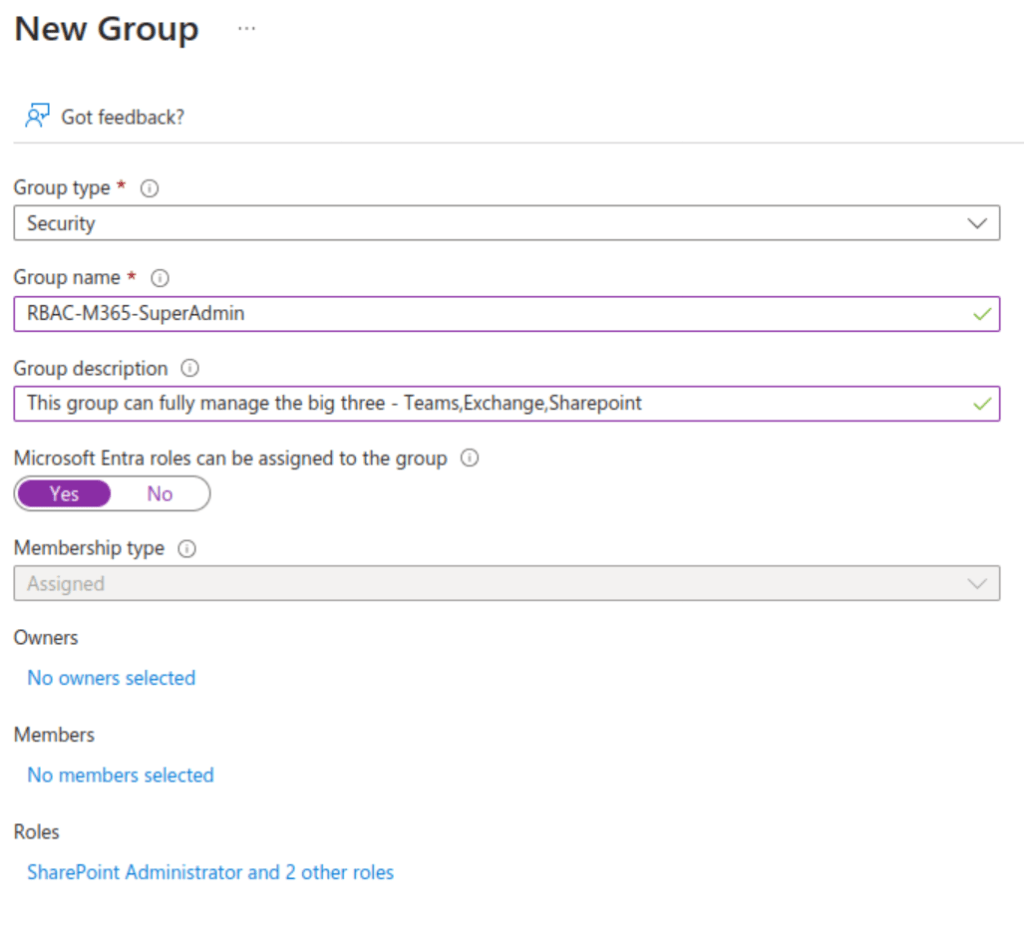
Was ist bei der neuen Gruppe zu beachten?
- Der Gruppentyp muss ‚Security sein‘
- Es braucht eine klare Namenskonvention (z.B. RBAC)
- Der Reiter ‚Microsoft Entra Roles‘ can be assigned to this group muss auf ‚Ja‘ gestellt werden
- Es werden keine dynamischen Gruppen für RBAC unterstützt
- Klickt man auf ‚Roles‘ erscheint folgender Dialog (verkürzt)
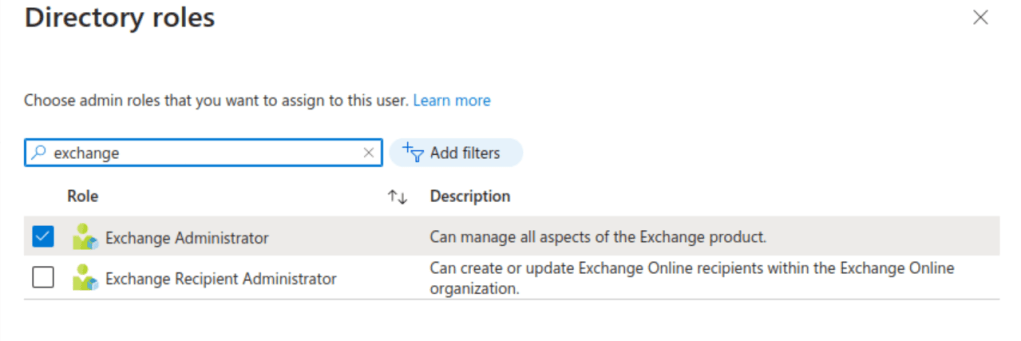
- Hier können nun die gewünschten Standard-Rollen direkt der Gruppe zugewiesen werden (Exchange Administrator, Sharepoint Administrator, Teams Administrator)

- Der Gruppentyp kann später nicht mehr geändert werden, was hier nochmals bestätigt werden muss (Create, Yes)
Was muss jetzt noch im PIM gemacht werden?
- Wir wechseln jetzt im Entra zu ‚PIM‘ und gehen dort zu ‚Groups‘
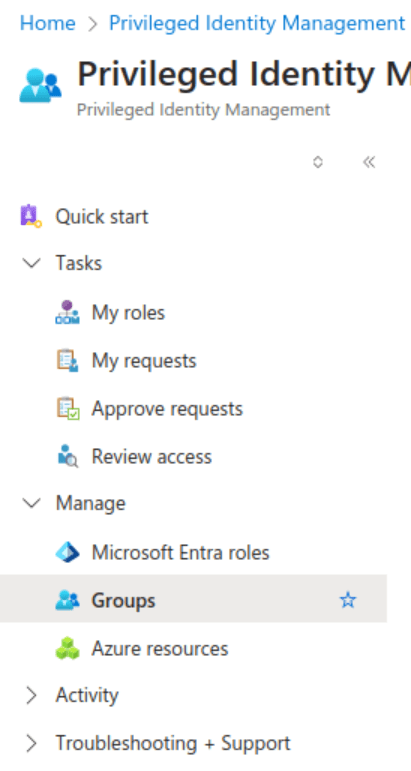
- Dann auf ‚Group Discovery’…

- Den Namen der erstellten Gruppe eingeben, die Gruppe ankreuzen und ‚Manage Groups‘ auswählen
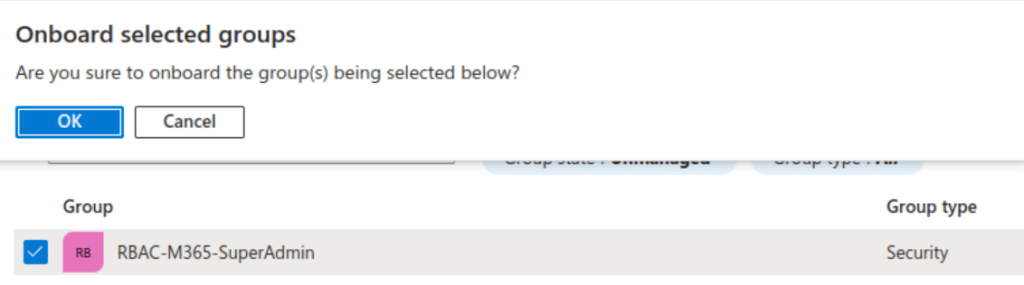
- Das Onboarding muss mit ‚OK‘ nochmals bestätigt werden
Was muss man auch noch wissen?
- Die Azure Rollen sind der RBAC Gruppe permanent zugeteilt
- Die Gruppe ist zu Beginn leer
- Die Verwaltung der Mitgliedschaft erfolgt nur über PIM
- Alles was im PIM passiert wird geloggt
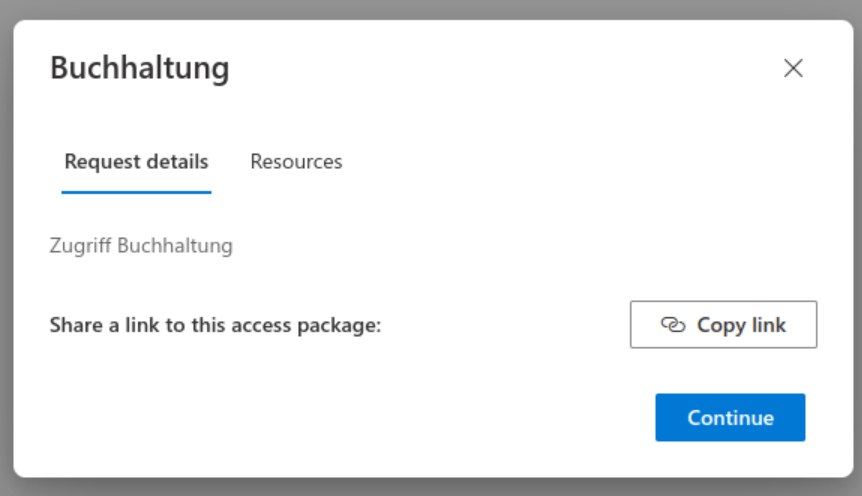
Ok, aber wer darf jetzt diese Rolle bestellen und wie lange gilt die Zuweisung?

- Ein wichtiger Schritt im PIM ist alle berechtigten Personen unter ‚Elligible Assignments‘ zuzufügen. Nur wer hier drin ist darf die Rolle überhaupt beantragen.
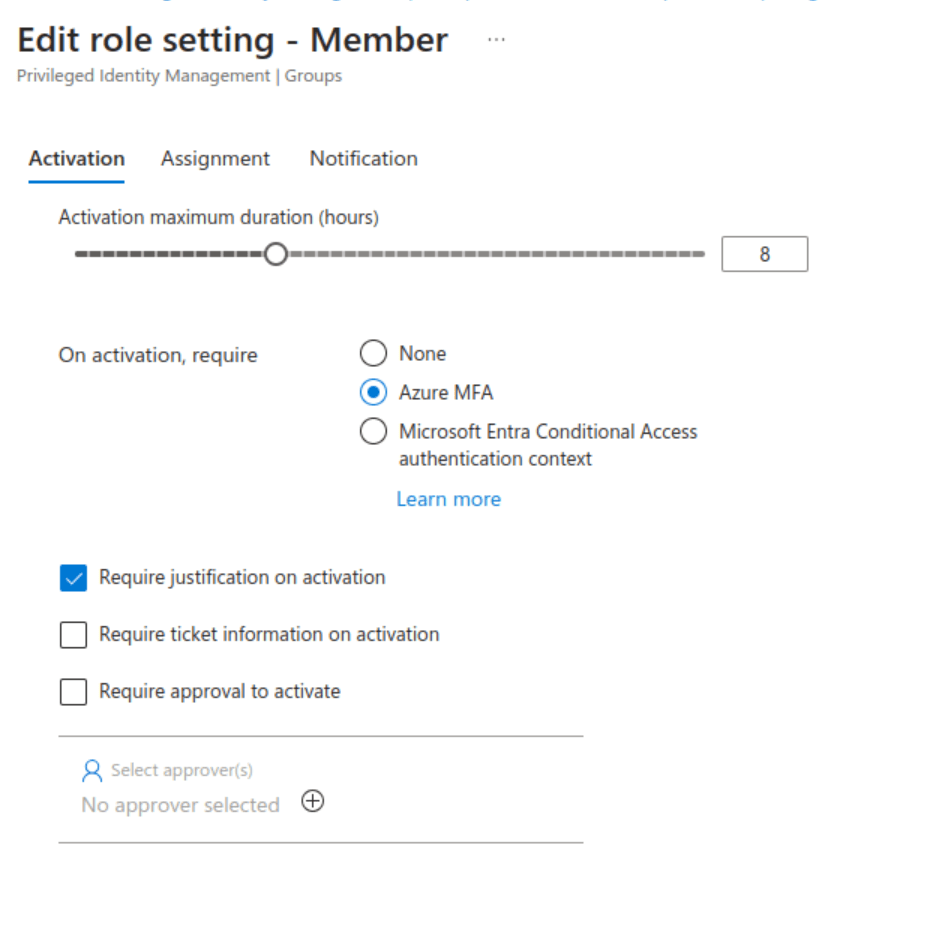
- Genau wie bei den Standard RBAC Rollen, kann man auch hier definieren:
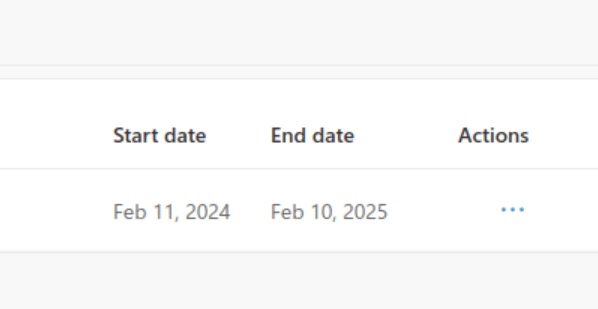
- Wie lange die Zuweisung gilt
- Ob jemand informiert wird bei Bestellung der Rolle
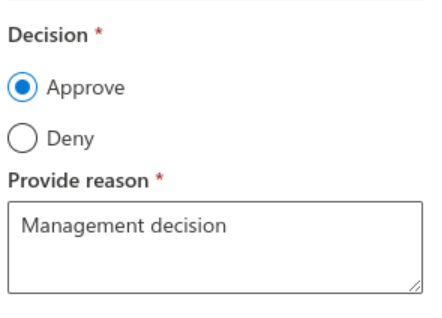
- Ob jemand die Zuweisung zuerst bestätigen muss (Approval)
- Ob es zusätzlich eine MFA Anmeldung braucht
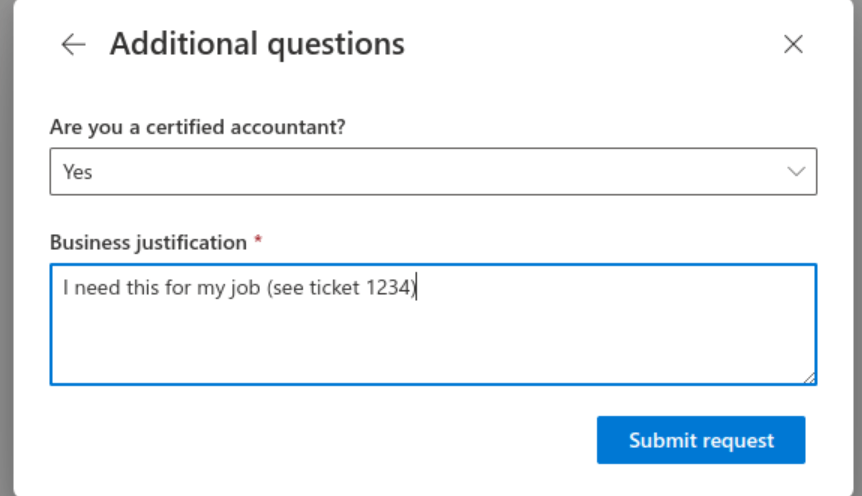
Und wo bestelle ich mir jetzt die Rolle?
- Das Azure Portal aufrufen
- Zu PIM wechseln
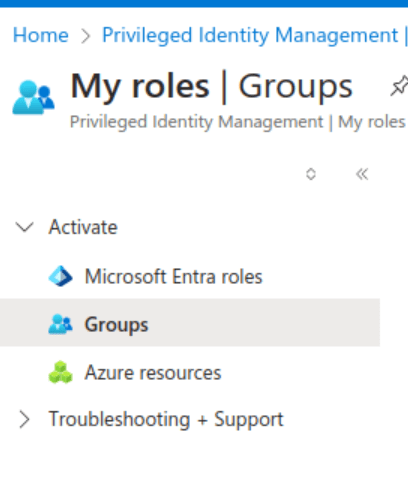
- Die RBAC Roll erscheint hier unter ‚My Roles‘ ‚Groups‘

- Mit einem Klick auf ‚Activate‘ wird die Rolle beantragt und je nachdem ob ein Approval nötig ist oder nicht direkt zugeteilt.
- In unserem Beispiel läuft die Berechtigung nach 8 Stunden automatisch wieder ab
Und das war’s!
Zum guten Schluss noch einmal eine Erinnerung an wichtige Seiten:
- Die Feedbackseite „Vorschlaghammer“ – hier kannst Du Fragen stellen oder Wünsche oder Ideen einbringen
- Die T-Shirt Seite – hier kannst Du das ClickCoach Team unterstützen und dabei noch gut aussehen