
What is something that all companies have in common? They need to protect their identities. And not just internal identities but external ones, as well. They need to know what changes have been made to important groups and accounts. Who made the changes and when? Are my key identities under attack? To be able to answer these questions, we need good reporting tools. What are cloud identities? Think of them as an extension of your internal accounts and groups. If you think of them that way, it clearly makes sense to use a single tool to report on both internal and external identities. Instead of using isolated tools that don’t give us the big picture, let’s replace them with something that doesn’t just look at Active Directory but that can extend that view to the cloud.

Today we’re going to talk about ‚Defender for Identity‚. It’s one of the arrows in the quiver of the Defender family of products. And, you guessed it, the focus of this ‚arrow‘ is…Identities. Did you know that ‚Defender for Identity‚ can be installed in a day and provides immediate value? If you’re like most companies, you’ll have a ‚legacy‘ product that looks at Active Directory only. You pay per user licenses for something that you’ve probably already paid for as part of your Microsoft Cloud licenses. It’s striking how IT often relies on legacy 3rd party products, mostly because ‚that’s they way we’ve been doing it‘. Defender does not require any additional servers or infrastructure. All you have to do is install the agents (aka ’sensors‘) and you’re up and running. The user interface is web-based and easy to understand and work with. Using Defender can save you money, right out of the box. And it’s not just about replacing your internal Active Directory reporting tool (although that’s a quick win). You’re extending and combining your views, to include your cloud accounts.
Your Active Directory Domain Controller is at the heart of your internal Identitites. So it makes sense to have these key systems report directly to the M365 Cloud solution. Your goal has to be to discover the state of users and systems in realtime and to act accordingly. This is in line with modern authentication and Conditional Access. If you’re able to move away from static lists to dynamic discovery, you’ll be able to react more quickly and discover threats as they take place (rather than after the fact).
If you want to give it a spin, you’ll need these permissions:
- Global Admin at Tenant level
- Domain Admin rights for your On-Prem Active Directory
To get started, you’ll have to download the agent (Microsoft calls it ‚Sensor‘) from the Security Portal under ‚General Settings‘.
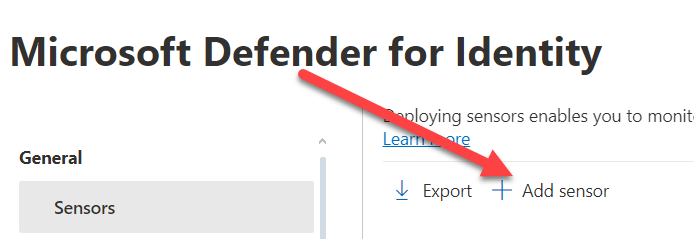
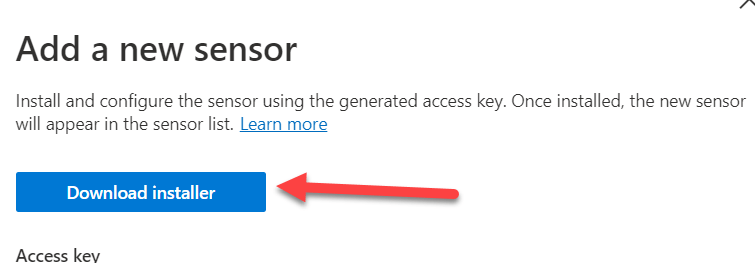
When you click on ‚Add Sensor‘, this will generate a random ‚Access Key‘. You’ll have to provide this key again when you run the setup on the Domain Controller, so don’t forget it. The recommendation is to install a ‚Sensor‘ on every Domain Controller to get the complete picture. And yes, there is a complicated und annoying way to run this on a member server instead (think ‚Port Mirroring’…). Why? Just do it the recommended way, and you’ll be fine.
Another option you’ll find under ‚General Settings‘ is the definition of the service accounts that are required. There are two different types of accounts:
- Directory Service Account – this is account with read-only rights to your local Active Directory. All this account does is read the current state of the directory. So don’t give this account any admin rights, as they are not required.
- Action Account – Yes, Defender can disable accounts or reset passwords pro-actively. If you install the ‚Sensor‘ directly on the Domain Controller (the recommended way) then the Local System Account will be used.
So is that all that’s needed to get ‚Defender for Identity‚ up and running? There is a missing step, and that is the activation of the Audit settings. You can’t report on something that’s not logged, so this is an important step. The good news is, that if you’re using any of the legacy Active Directory reporting tools, you probably don’t need to change much because most tools need these settings too. But don’t worry, if you fail to change these settings, Defender will tell you so as part of the health check. Details can be found here.
Be aware, that there is an initial 30-day learning period and during this time Defender builds a baseline of your network. The goal is to understand what is usual vs. unusual behavior. It’s possible to deactivate the learning period and to report on everything right away. However, this is not recommended as it may lead to false positives. Regardless, the reporting on changes to groups and accounts is available from day 1 and works a 100 percent from the start.
Next is an overview of the standard reports that you can run either ad-hoc or on a schedule. They are available from the Security Portal (Go to ‚Reports‘ ‚Identities‘):
- Changes to sensitive groups – This includes both well-known groups such as Domain Admins but also your own definitions.
- ‚Passwords in clear text‘ – Did you know, that even today, there are still programs that connect to AD by sending clear-text passswords, for example to run an LDAP query? Spin up your network sniffer and you’ll be able to read these passwords. To put an immediate stop to this, you’ll have to find the culprits firsts. And this report will show you the source of the problem.
- ‚Lateral Movement‘ – Imagine that the front-door to your house is heavily secured. Unfortunately, there is another entrance via the garage, with only a simple lock. ‚Lateral movement‘ means that less important accounts and systems will be attacked to gain control of privileged accounts and systems. This report will help you to identify these types of attacks.
- The ‚Summary‘ report does just what is says. It gives you a overview of all alerts and the status of the sensors over a period of time.
That all sounds wonderful, but how dow I replace my current monitoring solution so that can I report on all Active Directory changes?
Let’s recall the four steps that are required to replace your current AD Logging solution with ‚Defender for Identity‘ and at the same time extend your view to include all identies (Cloud and On-Prem):
- Change your Audit settings for Active Directory
- Download and install the Agent (aka ‚Sensor‘) on every Domain Controller (from the ‚Security Portal‘)
- Define groups and accounts you want to monitor (in addition to the well-known groups)
- Configure and schedule the reports to be notified of changes
That’s it! Let’s finish with five interesting facts about ‚Defender for Identity‘ that may help you on your journey to secure your environment:
- You can configure ‚Honeytokens‘. These are accounts that only appear to be important but are there to draw out hackers. Attacks on honeytoken accounts will divert hackers from your real assets but will still trigger alerts for investigation.
- Although ‚Defender for Identity‘ works quite well on it’s own, it will benefit from using additional Defender products. For example, you might learn from ‚Defender for Endpoint‚ that an attack has started by downloading a virus on a PC or by entering credentials on a phishing site.
- If you store ‚Password Hash‘ in the cloud, then that means Defender can compare the values against known Darknet sources. If a match is found, that means a password has been compromised and should be changed asap. You can configure Defender to reset the password.
- All the information gathered by Defender can be forwarded to ‚Sentinel‚ for further analysis and long-term archiving of events.
- The default monitoring can discover a large number of well-known attacks such as ‚Brute Force‘, ‚Golden Tickets‘ etc. A complete list can be found here.
This article is the final one to be published in 2023. It remains for me to wish all the readers a happy new year and we’ll be back with new and interesting topics in January.